The element visibility trigger in Google Tag Manager made a lot of things easier to implement. Before it was quite difficult to detect when an element appeared on the page. For example, tracking pop up window using GTM wasn’t so easy.
With the new element visibility trigger, we can now easily track banner impressions, pop-ups and especially form submissions that display a message upon submission. In this article, I will show you how you can take the most benefit from this trigger.
Form Submission Tracking without thank you page
You may already know multiple ways of form submission tracking, but also there are multiple types of forms. Those with a proper thank you page are easy to track with form submission trigger.
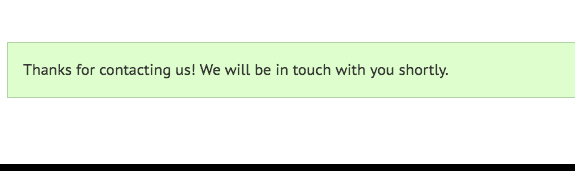
But the difficulty comes with the forms without a thank you page. These forms usually display a message when the form is submitted.
For tracking these kind of forms, we used to create a custom JS variable, that returns true when all the form fields were filled. You can read that method here.
Now, we have the element visibility trigger and we can use to track a form submission when the above message box is displayed. To do this, we will need to have the element ID or class.
Let’s follow the instructions below to track form submissions without thank you pages.
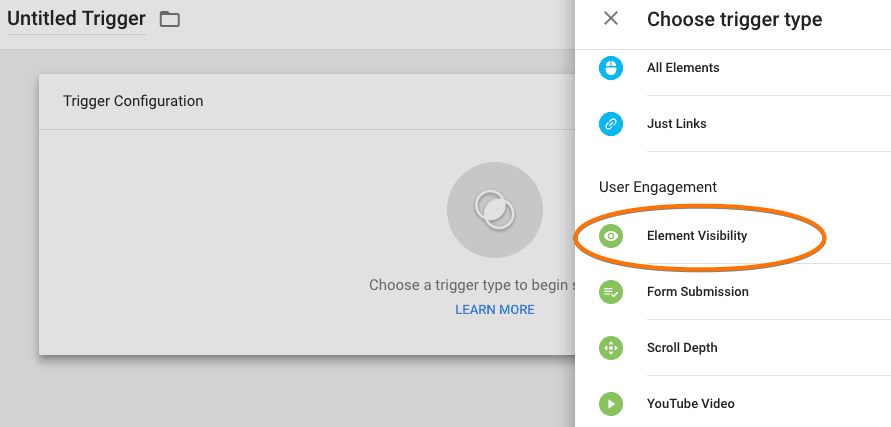
1. Create a new element visibility trigger
To create a new element visibility trigger you need to follow the following steps:
- Navigate to triggers section in GTM
- Click the new button to create a trigger
- Select the trigger type as element visibility
- Open your website contact form, fill out and submit
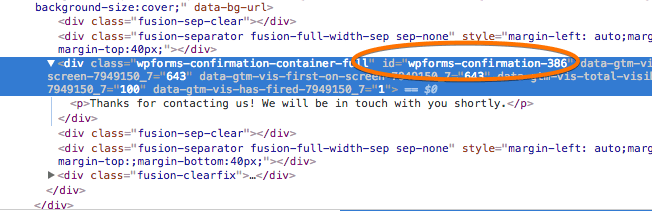
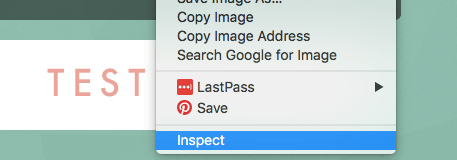
- When the thank you message appears, right click and inspect element
- Look for the id or class of the div of the thank you message element
- If there is an id associated with div, copy it otherwise copy the class name
- Now go back to the element visibility trigger you created before
- Paste the id into the element id field
- Fill out the trigger as displayed in the image below
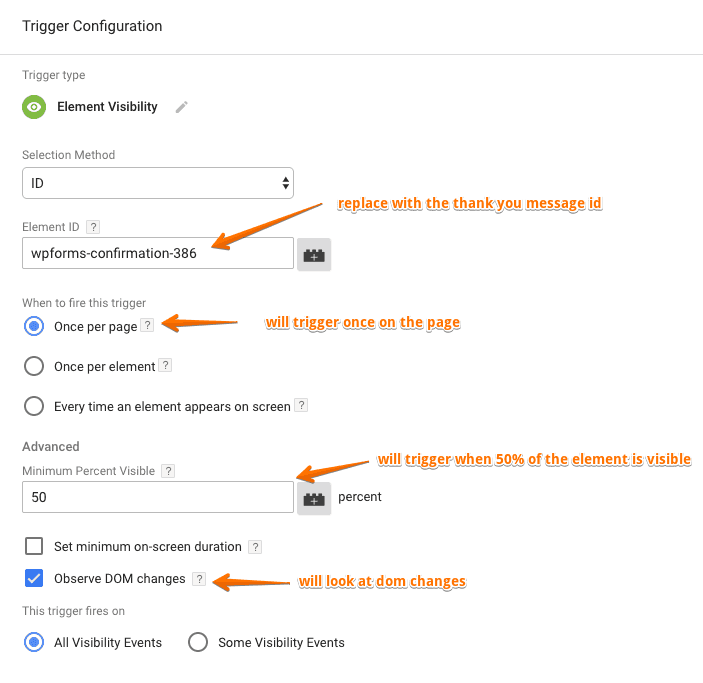
If the element does not have an ID you will have to select CSS selector from the selection method drop-down. Enter the class name in the element selector field i.e div.form-confirmation.
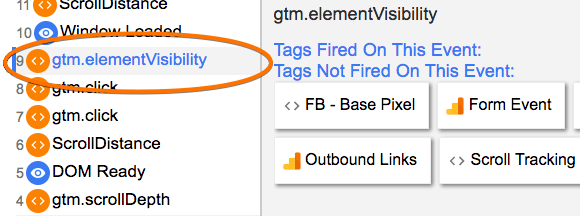
Enter a name for the trigger and save it. We will now test if the trigger loads when the element is visible. Open preview mode and submit a form on your website.
When the thank you message appears, the visibility trigger will load.
Once the trigger loads successfully, you can then create a new universal analytics event tag and send form submission data to analytics.
2. Banner Ad Impression Tracking
Another very important thing that element visibility trigger made simpler is banner ad impression tracking. Previously, we used to track banner impressions via JavaScript custom variable. It was a little tricky and one has to write a JS code. You can check our previous method here.
Let’s see how can we track banner impressions via element visibility trigger in GTM. I will talk about tracking both single and multiple banners.
Tracking a single banner
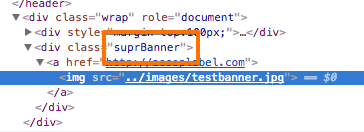
For example, we want to track a banner that is located in the footer of our website. To track the banner impressions, we will have to look for the id or class of the div that contains the banner. To do so, right click on the banner and click inspect.
Copy the class name or id of the parent div of the banner.
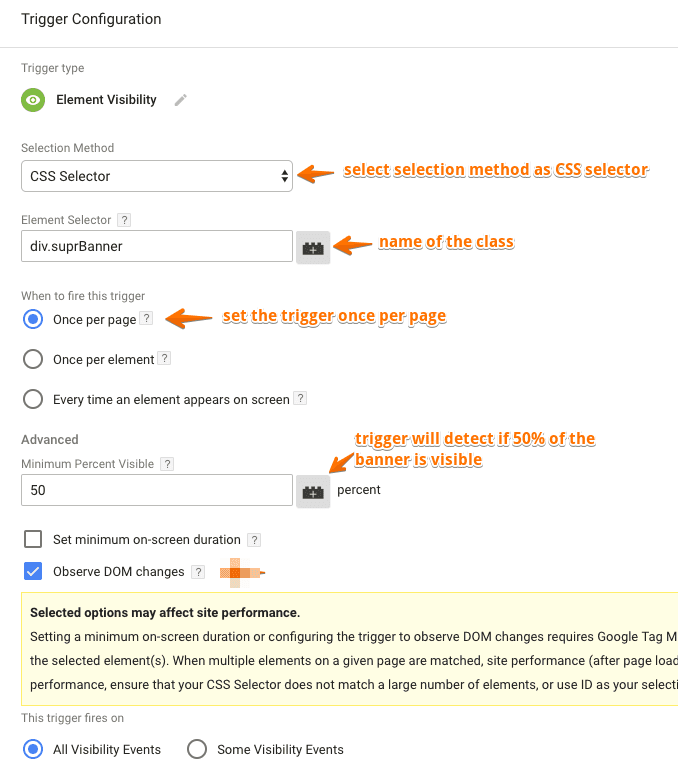
Copy the class name and navigate to your Google Tag Manager account. Go to triggers and create a new trigger of type element visibility.
Fill the trigger configurations as displayed in the image below:
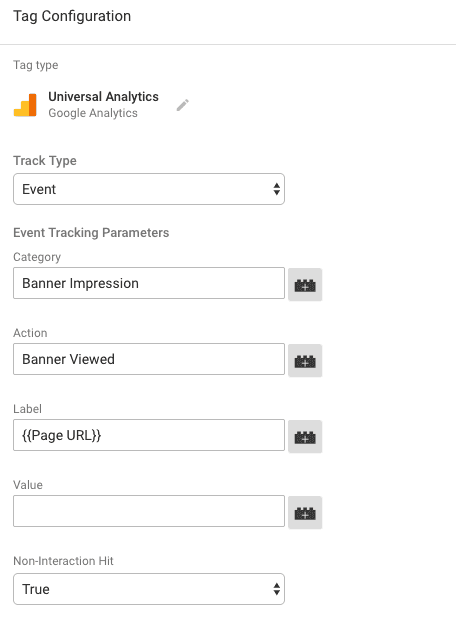
Enter a name for the trigger and save it. Now create a universal analytics event type tag to send the impressions data to Google Analytics.
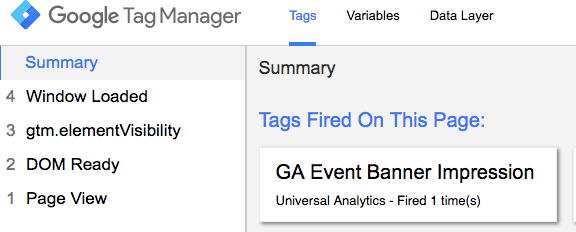
Set this tag to fire on the trigger we created above. Open preview mode and open the page containing the banner in a new tab. If you have followed the previous steps successfully, you will see the banner impression tag and element visibility trigger firing on the debug mode.
Now, we have tracked a single banner very easily. What if you have multiple banners on your website? Will you create separate tags and triggers for each banner? Obviously not!!
Tracking Multiple Banner Impressions:
For tracking multiple banners, we will use our old method of tracking multiple banners.
Let’s say your banners code is something like below:
<div id="sponsored-content" data-sp-content="paypal" data-sp-location="sidebar">
    <h1>Never Miss a Transaction!</h1>
    <p> 100% accuracy of paypal transactions in google analytics
    <a href="https://marketlytics.com/always-measuring/">Beta Signups Open</a>
    </p>
</div>
In the above script, data-sp-content and data-sp-location are important. These are used to track the banner name and location. Whenever you have multiple banners, you will
have to keep the div id similar for all banners and change the data-sp-content and data-sp-location.
For tracking all the banners, you will use the similar method we used to track single banner above. You will have to use the selection method as id in the element visibility trigger.
For tracking multiple banners, all you have to do is to create two custom JS variables that will track the banner name and location.
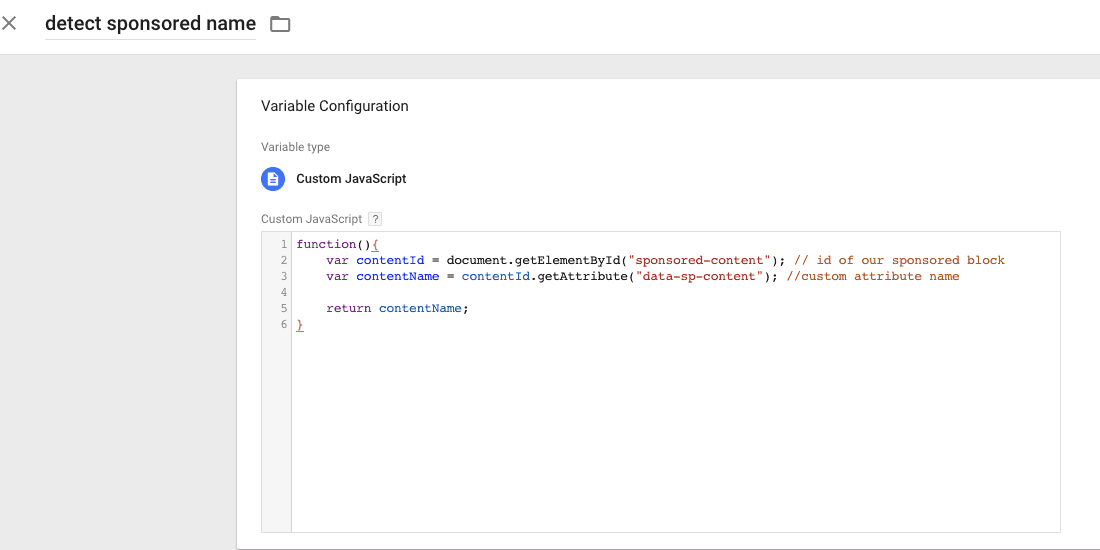
Let’s create the two variables. Navigate to variables and create a new user-defined custom JS variable and name it ‘detect sponsored name’.
Paste the below code in the JS field and save the variable.
function(){
    var contentId = document.getElementById("sponsored-content"); // id of our sponsored block
    var contentName = contentId.getAttribute("data-sp-content"); //custom attribute name

    return contentName;
}
If your banner has a class instead of id, use the below code:
function(){
    var contentClass = document.getElementByClass("sponsored-content"); // id of our sponsored block
    var contentName = contentClass.getAttribute("data-sp-content"); //custom attribute name

    return contentName;
}
Save the variable.
Now, create the next user-defined custom js variable and name it ‘detect sponsored location’. Enter the below code in the js field:
function(){
    var contentId = document.getElementById("sponsored-content"); // id of our sponsored block
    var contentLocation = contentId.getAttribute("data-sp-location"); //custom attribute name

    return contentLocation;
}
Similarly, change the id to class if your div uses a class.
Whenever, a banner impression is tracked these two variables will save the banner name and location of the banner.
The final step is to send the banner name and location to google analytics. There is no much hard work. All you have to do now is to open the universal analytics tag we created for single banner impression above. And add event action as ‘detect sponsored name’ and label as ‘detect sponsored location’.
![]()
Save the tag and open preview mode for testing and finally publish changes in GTM container.
3. Pop up tracking
Until now, you have understood the element visibility trigger very well. You can now track any element using this trigger.
For tracking any pop-up element, all you need to have is the id or class of the div. Using this you can track all your pop up forms, form field errors and modals.
Did you found this article helpful? Feel free to brag about your success in the comments below.
Related Posts:
How to Use Google Tag Manager for Event Tracking