We love data. The more of it, the better. While our work is focused on digital analytics, using customer data to analyze their patterns and behaviors, this year, we decide to take it one step further and focus on our own patterns and behaviors. We realized that we have a wealth of data on how we communicate with our clients using our two main communication channels, Gmail, and Slack.
These past few months, we have dived into the world of customer analytics and have worked on developing a cool data pipeline to allow us to observe our interactions with our clients in a more granular manner, using exploratory data analysis.
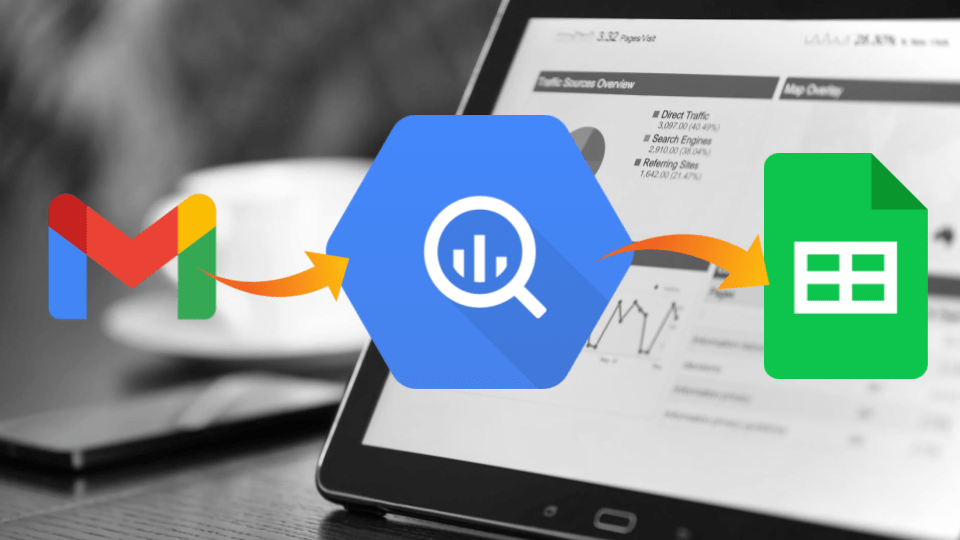
In this article, we are going to guide you through the process of developing a process that takes emails from your Gmail and pushes it to BigQuery, a fully-managed, serverless data warehouse that enables scalable analysis over petabytes of data. Big fans of Google’s Cloud suite, we have chosen Google Cloud Functions, a serverless execution environment for building and connecting cloud services.
Deployment
Before You Begin
Go through the following quickstart Guides to familiarize yourself with both, BigQuery and Google Cloud Functions, and enable the respective APIs,
Setting Up BigQuery
Creating a Dataset
A dataset is contained within a specific project. Datasets are top-level containers that are used to organize and control access to your tables and views. First, you will need to set up a Dataset so you can create tables inside it. Here is how you can do it,
- Open the BigQuery page in the Cloud Console.
- Go to the BigQuery page
- In the navigation panel, in the Resources section, select your project.
- On the right side of the window, in the details panel, click Create dataset.
- On the Create dataset page:
- For Dataset ID, enter a unique dataset name.
- (Optional) For Data location, choose a geographic location for the dataset. If you leave the value set to Default, the location is set to the US. After a dataset is created, the location can’t be changed.
Note: If you choose EU or an EU-based region for the dataset location, your Core BigQuery Customer Data resides in the EU. Core BigQuery Customer Data is defined in the Service Specific Terms.
- Click Create dataset.
You can also see Google’s comprehensive guide on creating a dataset for more details.
Creating a Table
Next, you will need to proceed to BigQuery to set up the environment and tables where you can store your raw Gmail data. For our purpose, we have a created a dataset called raw_gmail. Inside this dataset, we are going to create a table called raw_mail_response.
- Open the Google BigQuery Console.
- In the left pane under Resources, find your dataset and click on it.
- In the right pane, you will see an option for Create Table. Click on this.
- Enter the name of the table and specify the schema as follows.
We are going to use four fields for this table’s schema,
- event – String, RequiredThe event specifies the type of event – either it’s a message type or a label type. For this guide, we are only going to be adding message type events.
- action – String, RequiredThe action field will store whether the event is being added or removed. For this guide, we are only going to use the added action for message type events.
- response – String, RequiredThe response contains the complete content – in case of a message, it contains the complete content of the message.
- timestamp – String, NullableThe timestamp field stores the time the data was pushed to BigQuery so we can use it in the data processing section later on.
Once you have done the configuration, click on Create table.
Credentials
Now we can proceed to the Google Cloud Function section of the guide. We felt more comfortable to do this section in Python and have written the code in Python 3.8, which is triggered on a daily basis using Google Cloud Triggers. It pulls last day’s messages from Gmail and pushes them to BigQuery using Google’s Python client libraries.
You can either use our code or use it as a reference to write your own code in any other language you feel comfortable in. Below, we have provided brief documentation detailing what the code does.
Moreover, you will also need credentials to allow your code to access your Gmail data as well as upload the results to BigQuery. Here is how you can get those,
Getting BigQuery Credentials
BigQuery lets you authenticate with Service Account Credentials.
- In the Cloud Console, go to the Create service account key page. Go to the Create Service Account Key page
- From the Service account list, select New service account.
- In the Service account name field, enter a name.
- From the Role list, select Project > Owner.
- Click Create. A JSON file that contains your key downloads to your computer.
For more details, you can visit Google’s complete guide on Getting started with authentication. Once you are done, you will have a JSON file in the following format,
{ |
We are going to store this file on Google Cloud Storage, which is a RESTful online file storage web service for storing and accessing data on Google Cloud Platform infrastructure. It allows us to safely store and access credentials without exposing them in our code files.
Visit Google Cloud Storage Console and create a new bucket and store this file there. Make sure to use the same Google Project here as you will use for the Cloud Function. Copy the Path, you are going to need this later on.
Getting Credentials to Authenticate with Gmail
For Gmail, you are going to need to go through the OAuth 2 workflow. For this, you will first have to use Google’s guide.
You can also use the Credentials from Google and generate your own tokens using the code we have written. Once you run that code on your local machine, it will open a window in your browser and prompt you to approve your application and generate the credentials file.
It is provided over here as a GitLab snippet as token_generator.py. You will need to save credentials.json, provided by Google, in the working directory, and run this piece of code.
Once you run this code and approve the application, it will save the token.json file in your working directory. We are going to store this file on Google Cloud Storage as well so we can access it from our Cloud Function later. Upload this there and copy the path.
Creating Slack Webhook for Error Alerts
One additional functionality that we have built-in this code is the ability to generate Slack alerts to notify in case of any error faced
If you want to use it, you can create an incoming Slack Webhook and store the URL in the following format on the same Cloud Storage bucket being used for the credentials files.
| {“url”:””} |
Once you have created the credential files, you can move on to the actual work of creating the Google Cloud Function using the code in the main.py file. Below, we have provided the instructions,
Google Cloud Function
Creating Function
- Go to the Create a Google Cloud Function option menu.
- Enter the function name and preferred region.
- For Trigger type, choose HTTP.
- For Authentication, choose Allow unauthenticated access. For more security, you can also choose Require authentication but this will restrict your function in terms of accessibility. We suggest going with Allow unauthenticated access for testing purposes and changing it later to restricted.
- Click on Advanced and specify the configurations,

- Memory Allocated: 512 MB (Recommended)
- Timeout: 540 seconds (Recommended)
6. Click on Variables, Networking and Advanced Settings to reveal more options. Here, you will create runtime environment variables which are variables accessible to your function using the os library at runtime. We are going to use the components of code that need to be changed i.e. the Cloud Storage paths for our credential files as well as the name of our project,

| bigquery_credentials: <path_to_file>/bigquery_credentials.json google_credentials: <path_to_file>/google_credentials.json slack_webhook: <path_to_file>/slack_webhook.json project_name: <project_name> |
7. Once you are done, click on NEXT.
This will create your function and take you to the Source page where you can edit and add the code. There are two essential files you need to upload here,
- main.py – Contains the Python script.
- requirements.txt – Contains the packages required by the main.py script.
Both of these files are provided over here.
Google Cloud Scheduler
The final component is the Cloud Scheduler which is responsible for calling the Cloud Function. Here is how you can set it up,
- Open the Cloud Scheduler console.
- Click on Create Job.
- Provide a Description.
- Provide a Frequency in unix-cron format and select the timezone. In our case, we will be running it on a daily basis at 9 AM so we have specified it as “0 9 * * *”.
You can use this simple editor to figure out the schedule you want to run it on.
Note: Do keep in mind that if you plan to do it on a different frequency, you will need to modify the code as it is currently designed to fetch only last day’s data. - Choose the Target as HTTP.
- Provide the URL of your function. This can be found in the Trigger tab of your Cloud Function.

- Choose the HTTP method as GET.
- Click on Create.

Once the job is executed, you should see the following rows in your BigQuery table,

Code Architecture
Workflow
main.py is the code file that contains the Python script. We have provided a basic workflow of how this works below,
- The function is triggered using a GET request through the Google Cloud Scheduler on a daily basis at a specified time (for more info, scroll down to the trigger section).
- When the function receives the request, it executes the code at the entry point i.e. hello_world function. Here it checks if it received a particular search query, this option has been added to backfill and extract Gmail messages for a particular date. However, for the daily job, this functionality is not required and if the function does not receive a query parameter in the GET request, it will create its own query for the previous Date. For example, if the function is executed on 23rd December GMT time, it will create the following search query,
after:2020/12/22 before:2020/01/23 - It will load Google credentials and create a service object and verify connectivity by pulling labels from Gmail’s server.
- Next, it loads BigQuery credentials and creates a client object that is able to communicate with BigQuery.
- The table schema is created and formatted. For a batch upload job, we need to provide the data as well as the schema.
Finally, we execute the main loop in which we access all the emails based on our provided query using the users.messages.list method exposed by Gmail’s REST API.
| messages=service.users().messages().list(userId=’me’,q=search_query,maxResults=maxMessages).execute() |
Batching
Using the query “after:2020/12/22 before:2020/01/23”, we can access all emails after 22nd December and before 23rd December. Since the exact number of emails between the search criteria is not known and we can access only a limited number of emails at a time, we have implemented batching.
The batch size is controlled by the maxMessages variable which is set to 100 by default. The function will query Gmail for 100 messages and will upload these to BigQuery before proceeding with the next 100 pages. The nextPageToken parameter retrieved in the batch response is used for pagination. In case of any error, an alert is generated to Slack using the provided webhook URL.
After each batch is uploaded, we compare the Total Uploaded count and the Total Retrieved count to tally the numbers. In case the numbers don’t match, an alert is generated to Slack. All the Logging is done through a custom logging function that logs the event, the event type, and the time of the event.